The following outline describes the steps necessary to achieve system sealer flow as well as basic component setup procedures. This outline applys to a truck bed configuration but applies equally well to any type of system layout.
Mounting The System
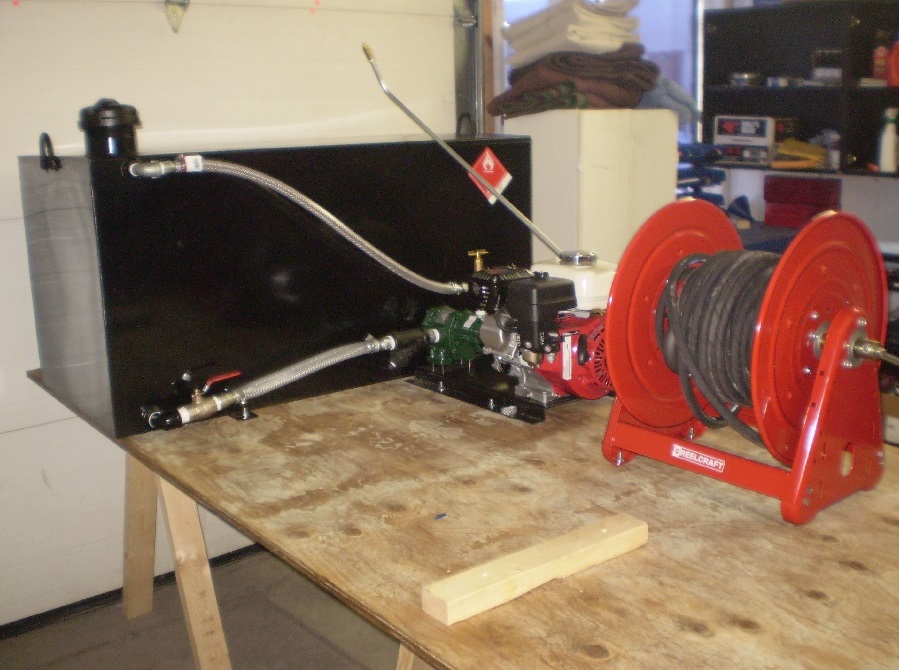
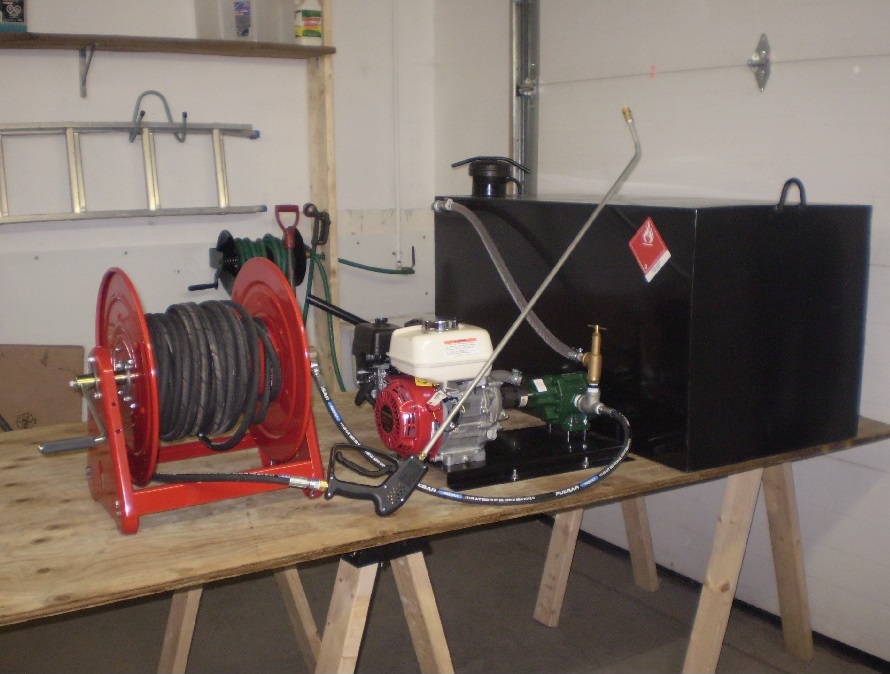
Mount the tank on the end of a sheet of 3/4 inch plywood as shown. Allow enough
clearance for the final assembly to slide into the truck bed. 3 inches approx. Bolt down the tank by its 2 brackets on the front of the tank.
Position the engine and pump assembly to the right side of the tank and bolt down. Allow
enough room to fit the PVC hoses for the intake ( Bottom 1 “ hose) and overflow ( 3/4” top hose) and overflow. Secure these with clamps provided.
Mount the hose reel directly behind the pump motor assembly and secure with bolts.
Connect the short 3.5 ft hose to the T fitting on the pump by screwing in the non swivel
end first then connect the swivel end to the hose reel and tighten. Use plumbers tape on all threaded fittings.
Connect one end of the 100 foot hose to the black spool fitting and wind the hose onto
the reel. Connect the spray wand to the hose. Slide the entire mounted system into the bed of the truck.
Priming the Pump and First Startup
Fill the tank with sealer and the gas tank with fuel.
Open the ball valve at the bottom of the tank ( Lever parallel to the pump intake hose)
Back off the pressure relief valve to its highest threaded position. ( Brass fitting with
T handle)
Start the engine and wait until sealer is seen flowing through the upper return hose.
Unscrew the tank cap and shoot sealer back into the tank and continue until all air is
out of the system. It is best to run the system through for 10 minutes with no tip on the wand to allow for any loose metal filings to pass through the Y strainer ahead of the pump. This will ensure that your wont plug the tip with residual debris in the tank from
its manufacture.
Attach the tip to the wand align the tip for flat stray pattern in line with the wand.
Adjust the pressure valve until an 80 degree fan pattern is achieved.
The basic function of the pressure relief valve is to depressurize the system and redirect flow back into the tank when the trigger is released.
General Maintenance and System Care
Oil changes should be done on a new system after the first full tank of sealer has passed through the pump. Then either every 5000 liters or twice annually whichever comes first.
The Y strainer coming off the tank and before the pump assembly has a mesh screen in its Y branch that should be cleaned out and inspected every few years. Its function is to collect tank debris before passing through the system. If this unit is clogged you may experience a reduction in spray pressure.
PVC hoses should be changed every few years as these tend to lose their elasticity over time especially from the interior out as a result of the action of sealer solvents on inside walls of the hose. You should test these by squeezing them to check for flexibility from time to time.
In low temperatures oil sealer binds and may even cease to flow at all. In the range of 0 to 15 C it may be necessary to cycle your pray back into the tank for several minutes to build pressure. This may also be necessary on frst spring startup if air has entered the system and you have buildup of hardened sealer in the lines. The solvent in flowing fresh sealer will break these deposits down and gradually return the system to full pressure.
Winter storage for asphalt cutback sealer machines is as basic as it gets. Sometimes nothing at all is required and you will have no issues on first startup in the spring. You can however use fuel stabilizer in the engine or drain the carburetor before storage if desired.
That in a nutshell sums up the basics of driveway sealing machine setup and care. By keeping ahead on regular oil changes and replacing worn or weathered parts when necessary your machine is well on its way to staying in top condition for years to come.